Atrexis the Grave Knight
Habilidades
Guía en inglés · traducción en curso
- Disarm
- Disarms the primary threat target.
- Raise Dead
- Summons skeletons during the fight.
- Thrash
- Adds pressure through extra melee attacks.
- Strike
- Deals an immediate hit to the tank.
- Unholy Frenzy
- Increases the attack speed of the boss and allies.
Guía en inglés · traducción en curso
Antes del combate
- Clear nearby Kirin Tor Necromancers before catching Atrexis in the sewers.
Plan de combate
- Let the tank collect the first skeletons before area damage. Remove the early adds, then focus the boss.
- Expect further Raise Dead casts and intense physical pressure from Strike, Thrash and Unholy Frenzy.
Tanque
- Reserve control for skeletons and a defensive for heavy melee damage or a disarm.
Sanador
- Prepare for tank bursts and keep healing while new skeletons are being collected.
DPS
- Wait for skeleton threat before area attacks, then focus Atrexis rather than extending the summon cycle.
Causas habituales de derrota
- Pulling the nearby Necromancers as well creates several simultaneous sources of skeletons.
Botín y recompensas: Bonebinder’s Signet · Graveweave Bindings · Gravespike Repeater
Arcane Anomaly
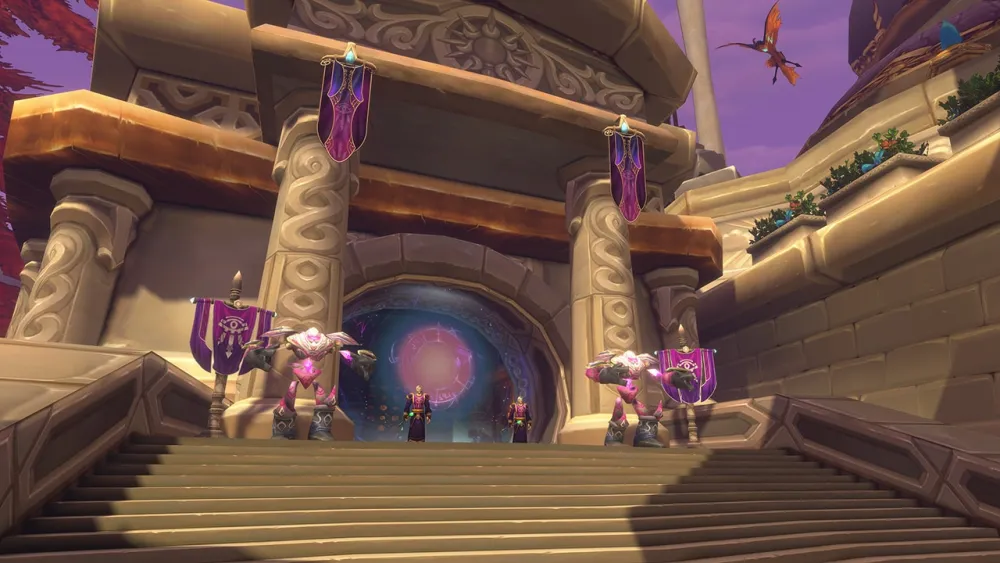
Ubicación: City of Dalaran
Habilidades
- Arcane Bolt
- Inflige daño Arcano a un objetivo.
- Focal Blast
- Canaliza una descarga dañina hacia delante.
Guía en inglés · traducción en curso
Antes del combate
- Clear space on Krasus Landing and plan to move around the boss’s rotating beam.
Plan de combate
- Hold the boss while avoiding the clockwise or counterclockwise Focal Blast.
- Continue healing through Arcane Bolt and physical tank damage while the group moves.
Tanque
- Keep a stable position away from the beam’s path without walking into surrounding enemies.
Sanador
- Move with a safe gap while maintaining range on the tank; expect Arcane Bolt spikes.
DPS
- Follow the beam’s movement instead of cutting across it for extra uptime.
Causas habituales de derrota
- Losing track of the beam while concentrating on the boss puts players in its sweep.
Botín y recompensas: Runemender’s Seal · Mana-Warped Chain Shirt · Ephemeral Grips
Arcanic Enigma
Habilidades
Guía en inglés · traducción en curso
- Manamorph
- Transforms a player; this magic effect can be dispelled.
- Silence
- Silences players close to the boss.
- Summon Manalings
- Summons additional enemies during the fight.
Guía en inglés · traducción en curso
Antes del combate
- Mark both Mana Phantoms and assign an interrupt or stun before pulling.
Plan de combate
- Kill the Mana Phantoms first and prevent Mana Burn.
- Dispel Manamorph, keep ranged players away from the silence area, and pick up summoned Manalings.
Tanque
- Collect Manalings before they reach the healer and keep the boss stable.
Sanador
- Stay outside the close silence and dispel Manamorph when a key party member is transformed.
DPS
- Interrupt the Phantoms rather than opening only on the boss; balance add damage with boss damage afterwards.
Causas habituales de derrota
- Letting both Mana Burns complete can remove the resources needed for the rest of the fight.
Botín y recompensas: Wand of Mana Concentration · Drape of Shifting Energy · Violet Sorcerer’s Robes
Unstable Sentinel
Ubicación: Magus Commerce Exchange
Habilidades
- Arcing Smash
- Golpea a enemigos en un cono frente al jefe.
- Malfunction
- Libera daño Arcano repetido en una zona cercana.
- Arcane Explosion
- Inflige daño Arcano a enemigos cercanos.
Guía en inglés · traducción en curso
Antes del combate
- Remove nearby Angry Tomes and leave space to retreat from Malfunction.
Plan de combate
- Turn Arcing Smash away from the party. When Malfunction begins, move out beyond its affected area.
- Regroup after the pulses and re-establish the tank’s position before committing melee damage.
Tanque
- Keep the frontal attack away from the retreat path and use a defensive when taking unavoidable damage.
Sanador
- Start at range and prioritize players leaving Malfunction without following them into danger.
DPS
- Melee should leave early enough to escape the pulses; a pre-emptive stun may prevent the cast.
Causas habituales de derrota
- Greeding melee damage during Malfunction stacks party-wide healing pressure with tank damage.
Botín y recompensas: Guardian’s Dualblade · Blueprint: Spinning Wheel · Unstable Crystalline Shoulderpads · Refractory Scaleguards
Mana Devourer
Ubicación: Violet Hold
Habilidades
- Debilitate
- Absorbe maná del objetivo.
- Drain Vitality
- Inflige daño Arcano inmediato y periódico.
Guía en inglés · traducción en curso
Antes del combate
- Clear the entire room near Violet Hold; remaining enemies join when the encounter starts.
Plan de combate
- Start with mana restored and commit damage deliberately to shorten Debilitate’s repeated mana drains.
- Maintain the tank through Drain Vitality while healing group damage from Debilitate.
Tanque
- Keep the boss isolated after the full room clear; watch the healer’s remaining resources.
Sanador
- Use efficient healing and plan for mana loss; do not enter with only enough mana for an ordinary pull.
DPS
- Use non-arcane damage options and avoid extending the fight through missed target focus.
Causas habituales de derrota
- Leaving room trash alive or starting low on mana combines extra enemies with resource pressure.
Botín y recompensas: Spine of the Devourer · Manascale Treads · Slitherwrap Girdle
Fel Ancient
Ubicación: City of Dalaran
Habilidades
- Entangle
- Inmoviliza a enemigos cercanos e inflige daño de Naturaleza periódico.
- Fel Timbers
- Golpea cerca de un objetivo y deja vapores venenosos dañinos en el suelo.
- Trample
- Inflige daño físico a enemigos cercanos.
Guía en inglés · traducción en curso
Antes del combate
- Speak to Grindle Firespark to remove the barrier and identify safe ground outside green pools.
Plan de combate
- Leave Fel Timbers pools as soon as they appear.
- If Entangle traps someone in a pool, use a root break or freedom effect and prioritize that player’s recovery.
Tanque
- Move the boss only as needed to keep the melee area clear of pools.
Sanador
- Watch rooted players in pools before returning to routine tank healing.
DPS
- Keep an escape route and help free a trapped player when your abilities allow it.
Causas habituales de derrota
- Treating a root as harmless while standing in Fel Timbers can cause a rapid death.
Botín y recompensas: Felbough Arm · Blightleaf Rope · Garb of Fallen Felbark
Lyn the Ignored
Usa Tome of Dalaran en el círculo de invocación de la sala con tablones sobre el agua al este de Underbelly.
Ubicación: Underbelly
Habilidades
- Curse of Thorns
- Maldice a un objetivo, cuyos ataques pueden dañarlo a él mismo.
- Raise Dead
- Invoca dos esqueletos.
- Shadow Bolt Volley
- Lanza proyectiles de las Sombras a enemigos cercanos.
Guía en inglés · traducción en curso
Antes del combate
- Bring Tome of Dalaran to the sewer summoning circle and restore resources before using it.
Plan de combate
- The tank collects skeletons from Raise Dead before the party uses area damage.
- Remove Curse of Thorns from attacking players when possible and heal Shadow Bolt Volley damage.
Tanque
- Maintain control of new skeletons while monitoring the punishment from Curse of Thorns.
Sanador
- Balance group healing from the volley with curse removal on the tank.
DPS
- Avoid feeding unnecessary attacks into Curse of Thorns and help control skeletons.
Causas habituales de derrota
- Summoning before recovery or ignoring the curse increases both add and reflected-damage pressure.
Botín y recompensas: Tendonscraper Dagger · Bonepile Gaze · Cartilage Shapers
Shade of the Archmage
Ubicación: Purple Parlor, Violet Citadel
Habilidades
- Arcane Bolt
- Inflige daño Arcano a un objetivo.
- Arcane Explosion
- Inflige daño Arcano a enemigos cercanos.
- Bounding Mana
- Lanza un orbe hacia un jugador; regresa y daña a quien golpea.
- Evocation
- Restaura maná rápidamente mientras se canaliza.
- Mass Polymorph
- Transforma a enemigos cercanos e impide temporalmente atacar y lanzar hechizos.
- Slow
- Ralentiza el movimiento, los ataques y los lanzamientos de enemigos cercanos.
Guía en inglés · traducción en curso
Antes del combate
- Enter the Purple Parlor together and keep the fight inside the room.
Plan de combate
- Move out of Bounding Mana’s outward and returning paths; reposition the boss away from the orb’s origin.
- Ranged players avoid the following close-range Arcane Explosion.
- At empty mana, expect Mass Polymorph followed by Evocation. Recover control and repeat the pattern after the transformation ends.
Tanque
- Reposition for the orb without pulling Shade out of the room.
Sanador
- Prepare for Arcane Bolt on the tank and the interruption caused by Mass Polymorph.
DPS
- Watch both passes of the orb and leave the short-range explosion area.
Causas habituales de derrota
- Crossing behind an orb after its first pass is unsafe: it returns along its path.
Botín y recompensas: Violet Sorcerer’s Mantle · Blueprint: Arcane Salvager · Ponderous Orb · Archmagister’s Faceted Pendant · Arcane Mote